Showing posts with label Kitchen Remodel. Show all posts

Monday, May 30, 2016

The Kitchen is DONE

We finally wrapped up the kitchen project (99% anyway).  We are absolutely in love with it.  It has been heaven to use it every day.  I feel so lucky we had the skills to get this all done ourselves.


We put in some pretty neat strip power outlets under all of the upper cabinets.  We also put in strip LED lighting.  It's really great to leave the under cabinet lights on in the evening to provide a glow in the room without every recessed light being on.


After we put the crown molding on, it was quite a relief to see everything come to a close.  We still need to do a back splash but I think the kitchen looks and functions perfectly fine without one for now.  That is the only thing!  Whoo hoo!


I do have my eye on this tile as a potential back splash, but I need to order a sample before I commit to anything.  I love the look of cement tiles, but they are very expensive.  This one has the look but it ceramic.  I originally wanted a subway tile but I'm feeling like that might be too boring.  No rush to decide.


Here's a link to what the kitchen looked like before our remodel if you wanted to see that again.  It's come a long way!

Tuesday, August 11, 2015

Washer Dryer Ikea Kitchen Cabinet Hack

Surprisingly this project was super fast to complete.  We expected it to be a huge headache so Brian kept putting it off.  Once he started it he finished in less than 45 minutes!  We were shocked it worked so smoothly.

Basically, we wanted a panel on the side that would be removable to easily access the water valves behind the washer and dryer if needed. 

Brian routered out three pockets and added these metal cleats.  Genius!

If you have any questions, let us know.


Wednesday, May 13, 2015

We've Really Slowed Down... But Still Finishing Up That Kitchen

So since the kitchen is totally functional and pretty amazing, we have totally slowed down.  We are close to done, but just a little left to do.

On the to do list is just:
  • attach cabinet toe kicks
  • add door trim and baseboards
  • install crown above cabinets
  • finish installing the under cabinet LED lighting strips
  • finish installing power outlet on island 
  • choose and install a back splash of some sort
  • and soooome day we will open up the wall between the living room and kitchen to make a bar top, but no rush on that.

We finally put all the pulls on (except one, can you find it?).  The under cabinet trim pieces were put on as well.


The drawer for recycling in the island is up and running.  What a convenience!  This originally was designed to house our trash, but we like our old trash can that we operate with our foot and it has a nice location too.  This was a welcome change of plan.


Every upper cabinet has these awesome power strips under them instead of a socket in the back splash.  We bought different lengths depending on the cabinet it went under.  We did a little outlet overkill, but that's ok.  It's better to have too many than not enough where you need it.  Plus they are hidden, so why not?


Also the dishwasher is so cool with the built-in door panel attached.  So fancy.  ;)


I love having my little breakfast bar area for cooking bagels and making my daily iced caramel macchiatto!  These two items used to take up the entire counter in the last kitchen.  So, it's nice having their own area off to the side.


Thanks for following up!


Monday, February 23, 2015

The Fully Functional Kitchen Has Arrived!

So all the cabinets are in!  The sink, the faucet, the oven, the DISHWASHER.  Wow, what a magical machine...

The day the counter tops went in felt better than Christmas.  We love them.

It has been about a week now and I've never been so excited to wash a dish in my life.  Once Brian got the faucet and dishwasher functional I went on a cleaning and washing SPREE.  I was so excited to put everything away in the cabinets I couldn't be stopped for even a "we're almost done" blog post.

There still is plenty of work to do, but at least we finally can slow the pace down and relax and enjoy our practically done, new kitchen, a little.

Things left to do are:
  • attach drawer/cabinet knobs and pulls (coming this week in the mail)
  • install crown molding on cabinets
  • install kick boards
  • choose and install a back splash
  • install under cabinet and island electrical plugs
  • install under cabinet lighting
and eventually:
  • open the wall between the living room and kitchen to create a breakfast bar
 A few friends have been over this week to check out the kitchen and they all have said it feels like a completely different house now because of the remodel.

I still can't believe it is ours and we did it all ourselves (except the floor tile and countertop).


 We have a contract to have our windows redone... in due time.  The missing cabinet in the island is out just while Brian finishes up the electrical plug install.

 The dishwasher has a matching cover panel, like the cabinets, but we can't install it until the pulls arrive.


 For a refresher on what the "before" of the whole kitchen looked like, click here.

IT'S ALMOST DONE!!!

Wednesday, February 4, 2015

The Sink is In and the Countertops are Ready for Templates


When we bought our sink we decided we wanted a 33" Kohler Whitehaven Farm sink.  It did come in a 36" or a 30" but we decided the 33" was just right.  Unfortunately the sink cabinets Ikea sold were only 36" or 30".  So obviously went for the larger cabinet to accomidate our sink, but knew we'd have to get crafty to make it work.  Brian's dad, Dennis, made this awesome steel frame to hold the 100+ lb pound cast iron sink in place perfectly without relying on the cabinet itself for support.


I did the gorgeous spray paint job to keep rust away. ;)


We used an Ikea side cover panel as the trim piece the apron of the sink goes against.  It worked out perfectly with 18" doors.  Slightly bigger doors would have been nicer but the doors offered by Ikea also didn't accommodate the sink in any other configuration.  We are very happy with it.

 
Next Brian and his dad had to really get creative with our washer/dryer cabinet.  The cabinets Ikea makes are not deep enough to house our machines so we had to come up with a plan.  The kitchen designer gave us some ideas and panels but the logistics were up to the guys.

Brian and Dennis made this cool base for the machines to hold the cabinet up at the proper height as well as keep it stable so the machines could rest on the ground instead of INSIDE the cabinet on a base or on flimsy cabinet legs. Again, the gorgeous paint job is by yours truly.


Once all the cabinets were installed the plywood for the counter tops was put in.  (We still have one upper cabinet to hang above the dishwasher area, but we will put that up while we are waiting on the counters to be cut.)

Tomorrow morning the countertop templates will be made and hopefully the counters will be in in less than a week!  We are so extremely excited.  Once they are in, we can install the faucet for the sink and have a fully functional kitchen again.

We are nearing the finishline.  It's been a lot of long nights and hard work and money, but it's all paying off now.

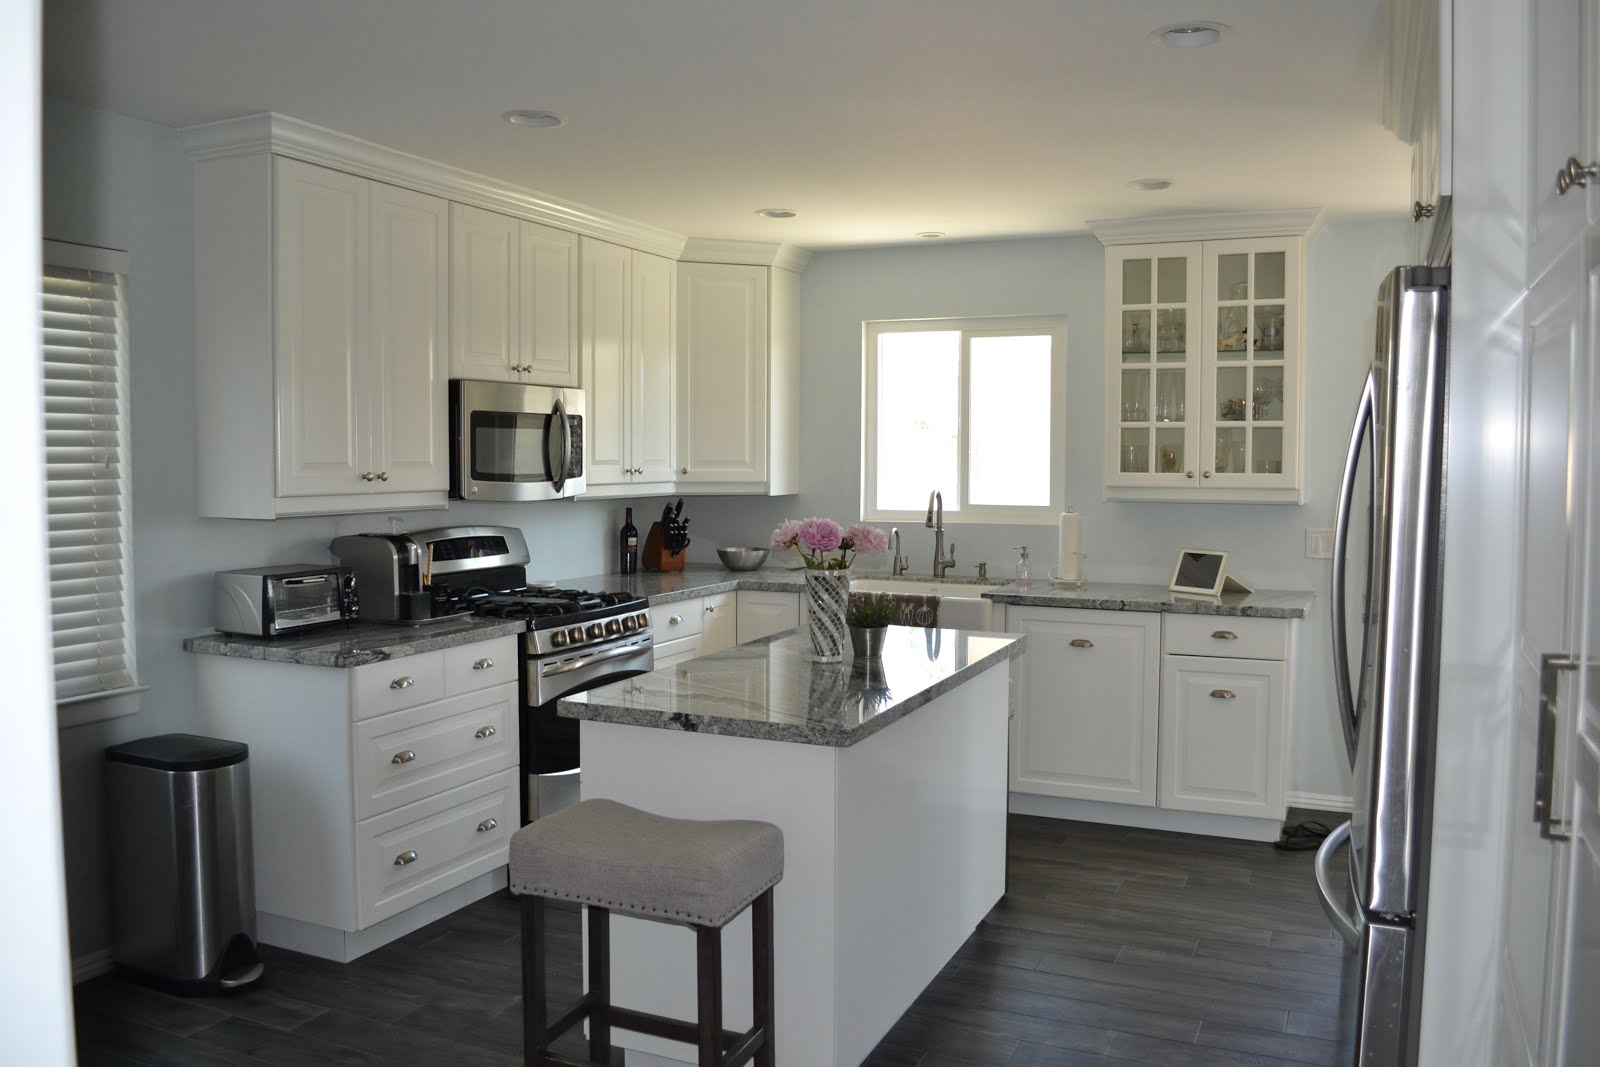
Now for your viewing pleasure, some Before and Afters:


 (Please excuse the missing pantry door.  The one we have is damaged and we are waiting for delivery of the new one.)

Thanks for checking out the progress!

Thursday, January 22, 2015

Halfway Through Hanging the Cabinets

So Brian and his dad have been making some great progress installing the cabinets!  The majority are complete around the stove.  One more wall cabinet will go above the washing machine area.

I am really pleased with how the microwave and oven are looking.  They definitely did not look so nice in our old kitchen when mismatched cabinets surrounded them.

I am anxiously awaiting using the oven and stove top, but since the sink is still in-op we have to wait on making baked on grossness type dishes.


 Tonight the guys installed one of the two pantry cabinets.  It is a starting point for that whole wall to be covered in cabinetry.  A cabinet will be above and surrounding the refrigerator, and the washer and dryer will also be inside of one.


You have no idea how excited I am to have the washer and dryer back inside the house and functioning.  Bye Bye Fluff and Fold Laundromat!  I was literally doing laundry in these pictures and also while I'm typing this up. 

The refrigerator is hooked up to the water line too.  We have ice, people!  I've never had a refrigerator make ice for me.  What a luxury!!!

Lastly, the island cabinets will be installed. All but two cabinets have been built so it's helping clear up the explosion of Ikea boxes that have been all over our house for the past few months.

Then comes granite!!!

Sunday, January 11, 2015

yes...Yes...YES!!!! Paint, Tile, and some Cabinets

Finally all the mudding and sanding has been completed.  That has definitely been the most boring, messy, long part of the the kitchen remodel so far.  So first thing's first; time for some paint.

Brian painted the ceiling and I primed and painted the walls.  I skipped over the areas that cabinets will be against so, no, I am not just a horrible painter. 

I chose a color called "Delicate Mist" by Behr paints.  I was going for a really washed out turqouise blue green color.  It seems that most of the time when I'm looking at it on the walls now it just looks like a grayish blue.  It's not what I wanted but it still looks good.  We will just roll with it for now.


The next day the tile guys came and started their install.  This is the only outside contractor we have hired for anything so we were nervous about them possibly not putting as much heart into our project.  Fortunately they were really great and did a gorgeous job!

They did about half the room and came back two days later and finished laying the tile.  Then on the third day they wrapped up the install by grouting.


The tile we chose is Italian porcelain called Woodland Black.  The grout is a dark matching gray called Storm.  I was a little hesitant picking a floor so dark but since everything else is white or almost white I figured it would look like a nice contrast.


We absolutely love it!


We gave the tile and grout plenty of time to dry and then started installing some cabinets over the weekend.  I built the cabinets and Brian and his dad did the hanging.  There was a little bit of a hold up figuring out exactly what we wanted to do with the crown molding.  I would like no gap between the cabinets and the ceiling so we had to finalize measurements and choose an exact molding.


It's beyond exciting to see the cabinets going in!  All of our hard work and patience is starting to really pay off.

Here's a little reminder of what the "before" looked like: