Monday, September 15, 2014

Exciting Kitchen Deliveries

First we had to clear a large area in our garage to make room for our cabinet delivery.

We went with Ikea cabinets so we will have to assemble them all.  I laughed that the directions for the entire kitchen install had one of their ridiculous little allan wrenches on the front.  Yeah right!

Some third party did the delivery.  They were pretty horrible.  They were really rough with our items, but at least the things that were damaged were easily exchanged.


It is quite a mountain just sitting there!  Luckily I've always enjoyed putting furniture together so I think it won't be too murderous.  I'm sure I'll never want to do it again after this project though.  Good thing I have a growing son.  ;)


Later in the week our refrigerator came.  I'm totally in love!  We got it, and our dishwasher on sale at Howard's Appliances in Long Beach.  Our sales person was Tom and he was excellent!  We got killer deals previously on our oven and microwave there.  The refrigerator was $600 less than the best price I could find online!  Maybe it was a mistake, but I jumped on that!

It was pretty awesome watching the Howard's delivery guys do their thing.  That strap they used looked way better for the refrigerator than a dolly.


For now the refrigerator is parked in the dining room (aka our make-shift kitchen) until all the demo and drywall work is done.


Our sink is coming UPS today.  We ordered a Kohler Whitehaven farmhouse sink.  And of course I didn't pay anything near that retail price.  Come on now, you know me!  Thanks so much to my anonymous friend with a killer job discount!

Let the Kitchen Demo Begin!

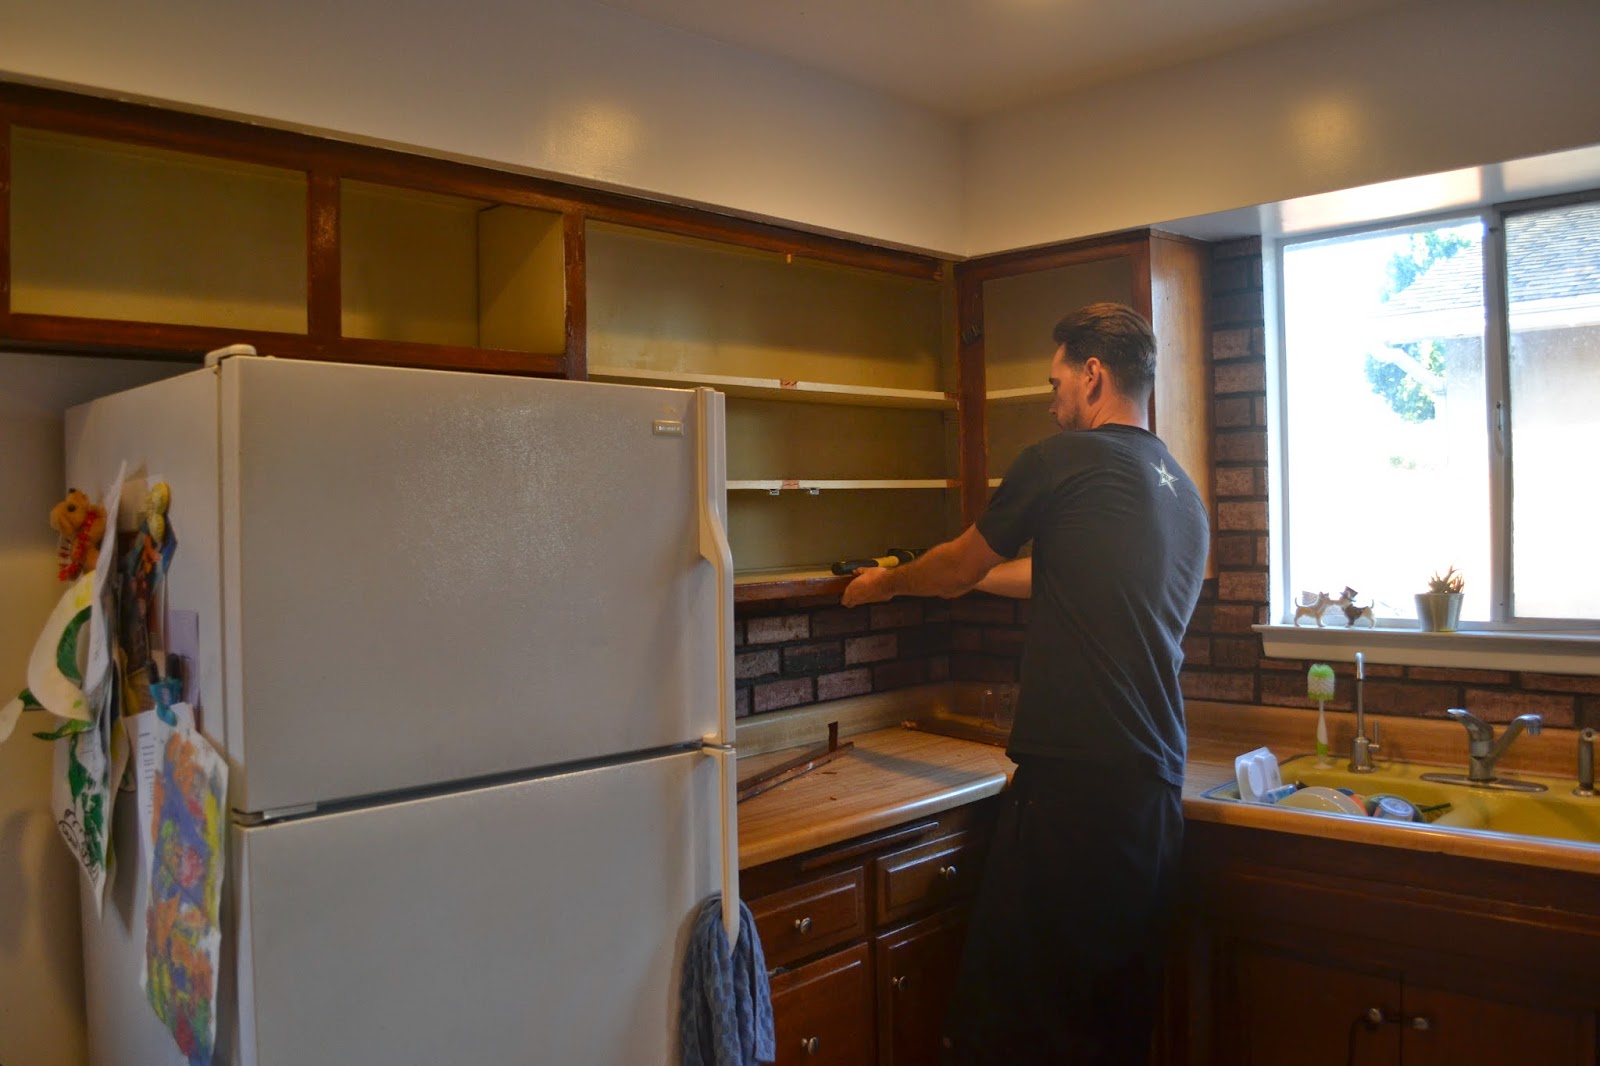
So some serious demo has started.

I can't put into words how thrilled I am to see this disgusting, lint collecting, fake brick go!

This mini bee hive (with no bees)  was an interesting surprise in the wall.


Tuesday, September 9, 2014

Making the Perfect Nursery Glider Chair

During my pregnancy I wanted to find a glider chair to have in my son's room. Maybe it was the hormones, but I could NOT find the "perfect" one!

I knew it was something I wouldn't want in his room forever so Craigslist was definitely the place to shop.  I found one in great condition that looked super comfy, but I hated the look.  I am NOT a fan of brown.

I bought the chair from a nice couple who had used it for under a year when their son was also a baby.

Now to the good stuff, the DIY nesting part of my brain took over and I painted and reupholstered the chair.

First, I took the arms and the cushions off the chair to get it ready for painting.  I sanded the chair by hand to get the glossy finish off.  I wasn't sure if this step was even necessary.  It might have even roughed up the chair unnecessarily, but meh, whatever.  I'm no expert!


I used about two cans of rust-oleum primer spray paint.  Next I think I went through about 3 - 5 cans of white spray paint to completely cover the chair with a solid finish.  I left it outside for about 2 days to dry and air out while I made the seat covers.

Next, I went to Joann Fabric and pick a cute frog baby blanket fabric.  It's sort of a flannel.  In retrospect I should have picked a fabric less stretchy, maybe some ::cough, cough::, upholstery fabric, but hey, I was going for "cute" here.  In the long run it held up fine.  I'd just recommend a firmer fabric for anyone else who attempts this.


So anyway, I took each cushion off and simply laid each piece on top of my fabric pieces and drew out the shapes.  I basically made a pillow case for each part.  I didn't want to remove any original fabric incase my reupholstering job totally sucked.  I'd at least have the original as a back up.

I stuffed the seat into my pillowcase and hand sewed the back edge shut.  I used green ribbon and also sewed that into the back edge so the seat can reattached to the chair.

I had to get a little creative around the front corners of the seat and along the top of the head rest.  If parts looked too loose, I'd just flip the fabric inside out again and sew the pillow case shape a little smaller. I did put two pleats on the edges of the front of the seat to keep it neat.  I honestly just "winged" the whole thing.  My grandma would be proud if she had seen my sewing skillz.  ;)  I know that's horrible advice if you're trying to use this as a tutorial though.  Sorry!

As for the arm rests, they only attached to the chair with snaps.  I made similar pillow cases for these sections and just cut rough holes where the snaps clipped.  They were hidden so the rough holes didn't matter.

The top portion also used snaps.  I made small pillowcase coverings for the snap straps there as well and also just cut rough holes for the snaps.  I hand sewed the edge of the covering onto the main piece so it wouldn't pull forward.


Lastly, I used a staple gun and just stapled fabric over the detached cushion section of the ottoman. That part was the easiest.

Overall, the reupholstering has held up well!  We used it more than a whole year, daily, in his room. Like I said, I'd choose a more rigid fabric if I were to do it over, but if you have any sewing ability I'd say go for it and make that chair a one of a kind!

A kid room is the best place to get away with making some goofy fun DIY furniture.


Making Room for Dean

The last bedroom to get a make-over was that of our son, Dean, when he was on his way.  :)

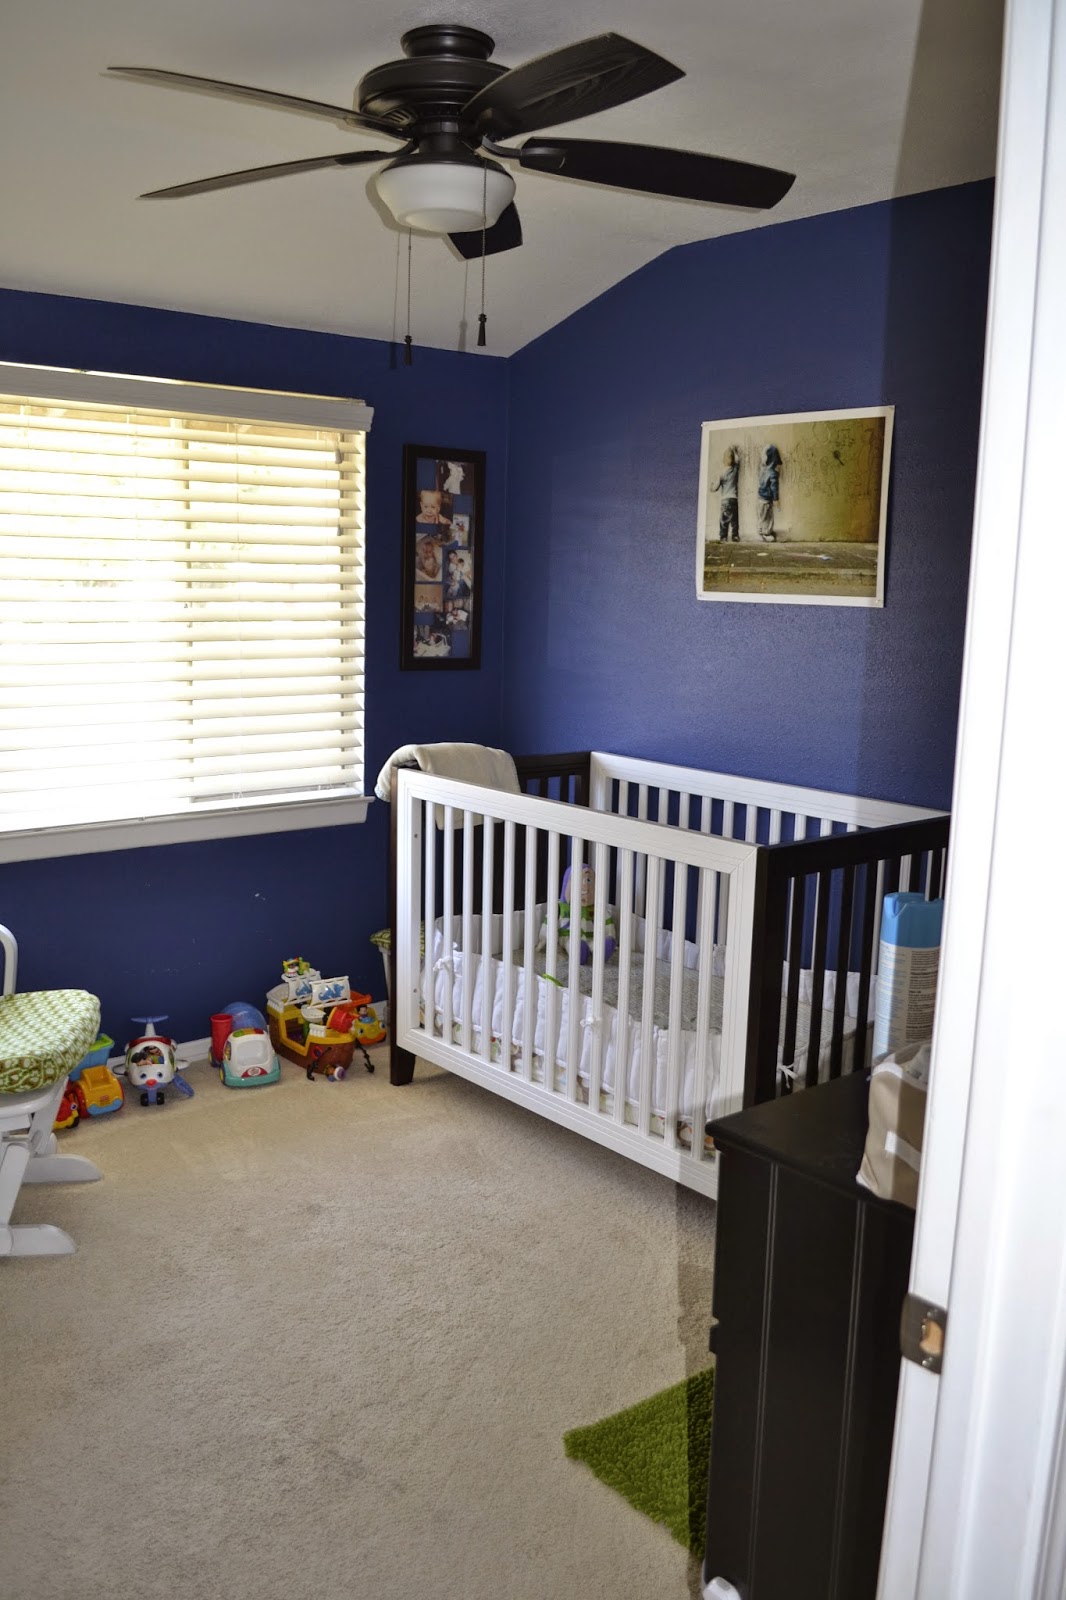
The room up until this point had always been our "extra crap storage room."  It first had this disgusting ancient blue carpet that we tore out pretty much the minute we purchased the house.  But what was underneath was this ugly yellow tile.  A lot of it was breaking apart so we pulled it all up when we finally got around to getting this room ready.


Here you can see the original carpet and the mess we made onto it (on purpose) scraping ceilings before we first moved in.


After Brian touched up any spots on the ceiling walls with mud, we sprayed texture onto them with a hopper. Brian also installed a new closet door and entry door.  He replaced the lame light fixture with a ceiling fan.

For the paint scheme I painted the majority of the room white and two walls a very dark navy blue.

We called Empire to install some carpet.  I don't know what I was thinking putting carpet in a kids bedroom.  Now that he's a toddler it's pretty trashed.  :(   But I just have always preferred carpet in bedrooms.


Going through the nesting phase of pregnancy I created more projects than there were walls to hang them on for the room.

In my childhood room I had two frames each holding baby pictures of my parents.  I decided to do the same for Dean.  I hung those on either side of the window.

I had a photo of some street art I love blown up and hung that over the crib.

Pinterest even hooked me into doing a melted crayon "painting" which turned out pretty nice.

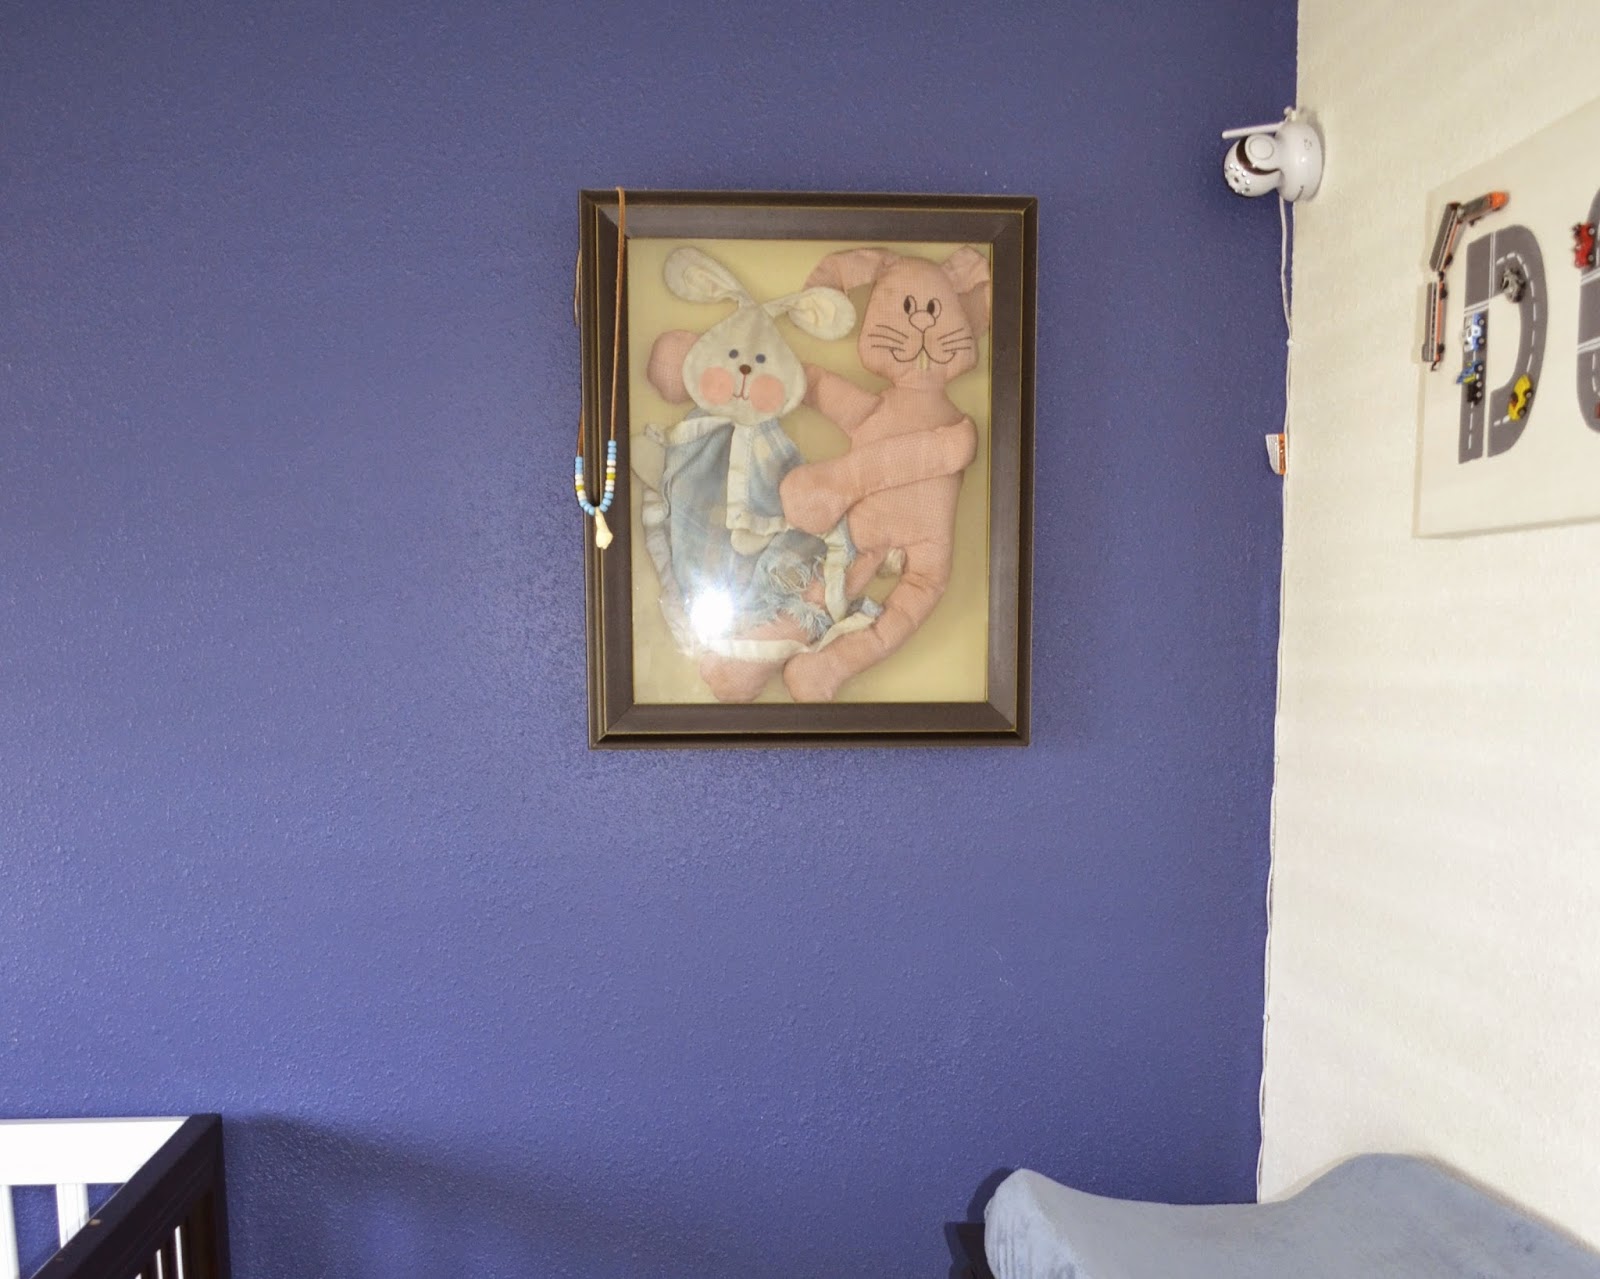
Brian and I both had bunnies when we were babies that we still had possession of so I framed those in a shadow box.


I copied an idea I found on Stumbleupon.com of painting roads as Dean's name.  I used Brian's childhood micro machines and hot glued them onto the painting.


Lastly, I even went all out and painted and reupholstered a glider chair and ottoman that I bought for $50 off craigslist.  You can see that blog here.

Sunday, September 7, 2014

First Batch of New Windows Go In

So finding a window contractor vs. doing it ourselves was pretty confusing.  So many contractors had such different prices and offered so many different products.

We had been shopping for windows pretty much since we bought the house.  Ours are the worst!  They are original crank style casement windows.  The seals on them are non existent and they are one thin piece of glass that are original from the 50's.
Finally we decided on American Vision windows.  We felt like they struck the balance of a great product, not too expensive price, and fast install.  We got the Del Mar by Anlin windows.

I'm confident we could have installed windows ourselves but with so many other things on our plate, this might be a project worth just paying the extra to have someone else finish.

We signed a contract with American Vision that allows us to buy a minimum of three windows at a time for the agreed upon price as long as we own the house.

So we opted to have the front windows installed first.  Although this is the side that gets the least amount of sun, they get the most hands on contact from our son.  We particularly wanted to replace the huge living room plate glass windows for his safety.

What a difference!  We absolutely love our windows.  The installers put in one of the living room windows a little crooked.  I put the pressure on and had them fix it before they left.  They agreed and did a great correction so they are perfect now.

Can't wait to do the next batch.


Down Come Some Kitchen Cabinets!

So first thing's first, the upper cabinets need to come down to make way for the water heater plumbing.

Currently the water heater is in the kitchen, but it's getting moved to the patio to make room for our panty and refrigerator.

We didn't want to have pipes running down the exterior wall into the water heater cabinet so Brian is installing them inside of the walls.

Poor guy is dying up in the attic doing a lot of the work.  It's 90 degrees out right now so of course it's about 500 degrees up there.  haha

Also, Brian and his dad installed a new gas line to where the ovens new location will be.


The Bathroom Complete

I guess I can't have a bathroom remodel blog up and not an after section!  If you didn't see that blog, check it out here.

So here is the after.  It's absolute heaven to call this bathroom my own.  Especially after all the hard work we put in.

The light blue paint is a color I am in love with called "Pebble" by Behr paints.

I laid and grouted the ceramic floor tile myself.  Brian did the tile cutting.  As for the shower surround, we hired a guy referred to us named Nacho to do that.  After my little floor project I felt like leaving the smaller Carrara marble tiles to the professional.

The floor tiles and the marble tiles were both purchased at Lowes.  The accent tiles in the shower surround were from a tile speciality store called Strictly Stones in Anaheim.

The toilet is always a topic of conversation because it is a dual flush by American Standard.  Its model number is 3381-216.  It's a really cool modern design and I love anything energy or water efficient.  But, it's by all means no whimp when it comes to pressing the #2 button!  It has more flush action than a standard single flush toilet.

The vanity, mirror, and crushed marble countertop were bought from Builder's Surplus in Santa Ana, CA.  Brian and his dad did the install.

The light fixture is also from Lowes.  It's the Portfolio 4 Pacer Brushed Nickle Light #93240

The heavenly deep whirlpool tub was from Home Depot.  It is an American Standard Everclean Integral Apron 2425 RHO.  It's been in there for a few years now and we haven't had a single problem.  I love it.  So does our son.
Overall everything turned out amazing.  We couldn't be happier.  Especially as a mom, I need my private oasis, with 8 vanity drawers, to escape the day and relax!